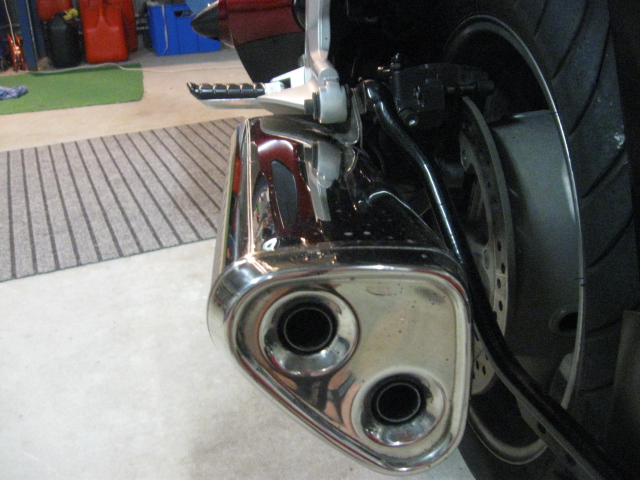
Well - you saw in the previous posts that Stella was in need of a bath - so now was a great opportunity to give her a good scrub...
This is what $6000 looks like when not arranged properly...
And here it is getting a tub...
And here is the result...
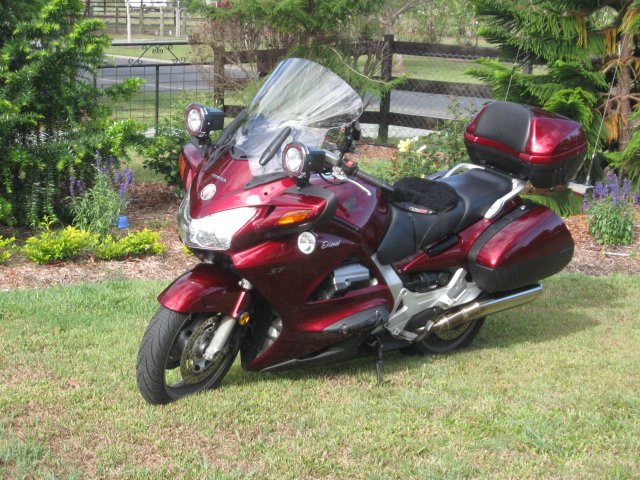
And here she is in all her glory.... (I have since removed the Airhawk and Sheepskin seats)...
And here is the proud dad...
This has been a fantastic exercise, and the results, as they say, speak for themselves.
Now I have a very capable and reliable long distance weapon that is further customised to my needs and likes. You can see the V-STream windscreen fitted here as well. I think I am done - (yeah right!)
Cheers, Diesel
This blog chronicles events and milestones I experience in the ownership and operation of the famous Honda Pan European ST1300. You will read about from the day I bought it and the 1200km ride home, and you will see a whole community and website forum grow out of my passion to ride with like-minded legends. Read by the post's date so the story unfolds in the correct chronological order.
Thursday, December 6, 2012
Part 5 - Diesel's Spring Clean and Rewiring Project - Headlight Cut Out Bypass Switch Installation
Fitting the Headlight Cut-out Bypass Switch
With HID Lighting, it is said that they don't much like stopping and starting up again - but give longer life and better perfomance if they are able to be left on - much like flourescent lighting in office buildings.
Like many bikes, the ST1300 Pan European is set to have her headlights come on with the ignition, but then cuts power to them whilst the starter is being engaged, only to power the lights on again when the starter is released - giving that on-off-on pattern. (This is the case for Australian models at least - other countries may vary).
After much talking with two very good OzSTOC friends of mine and electronics genii to boot - Mal and Brock - they sent me over from Perth W.A., a mini loom that intercepts the current to the side stand - and this can be put through a relay on the headlight circuit.
The end result is that the headlight will stay off until the side stand is folded away. This in turn switches the headlights on.
 It involves wiring this relay a particular way...
This great little mod allows me to turn on the ignition and wait for the FI light to go out and the fuel pump to prime before I hit it with the cranking power drain.
Thanks guys for a great piece of help.
After much talking with two very good OzSTOC friends of mine and electronics genii to boot - Mal and Brock - they sent me over from Perth W.A., a mini loom that intercepts the current to the side stand - and this can be put through a relay on the headlight circuit.
The end result is that the headlight will stay off until the side stand is folded away. This in turn switches the headlights on.
 It involves wiring this relay a particular way...
This great little mod allows me to turn on the ignition and wait for the FI light to go out and the fuel pump to prime before I hit it with the cranking power drain.
Thanks guys for a great piece of help.
Part 4 - Diesel's Spring Clean and Rewiring Project - Fitting and Wiring HID and Halogen Spotlights
Lights and Lighting Wiring
I selected the area above the nose cone to house the twin ballasts of the HID lighting equipment...

And I set up a negative (earth/ground) busbar to accommodate all the groundings for the front end.
I did this where I removed the now defunct speaker box (pictured is the one on the RHS)...
And I gave it a GOOD earth strap...
Also mounted the 55W halogen (under mirror) spotties' relay here too...
The 'brains' of the HIDs, I mounted in a similar position on the RHS....
Next was to put the apparatus / equipment in place....
Here, I bend the tabs back on the H4 HID base to make it fit to the H6 coupling in the headlight array...
I mounted a pair of good quality switches to independently operate the HIDs and Halogens...
And finally - the HID spotlights....
Now it was time to join all the dots - with wires!...
You can see above that I colour coded the wiring to keep everything in check at the various other points of the bike where the leads pop out.
Now to test the system..... Compare this......
To this....
Aaaah! SUCCESS!

Part 3 - Diesel's Spring Clean and Rewiring Project - ST1300 Pan European
What confronts a night rider in Australia?
I had to upgrade the lighting on my Pan European ST1300 because of the amount of night and early morning riding I do/plan to do. In Australia, when the sun goes down, the kangaroos come out to feed. Some years we have plentiful rain, and this is a little better for motorcyclists as opposed to the drought or dry years. Why??? Because by the shoulders of the roads are what we call tabledrains. All roads, highways, streets, etc have a crown, a camber, a shoulder, a gutter (if they are a suburban or city street, and/or a tabledrain if they are a country road, street or highway.
As kangaroos frequent the country roads and highways, the tabledrain is where they gather. The tabledrain is the lower part of ground next to country roads that all water is designed to end up in as it runs off the road. This is where the last remnants of water is found, and the grass is a little greener than the paddocks - hence drawing the marsupials near the road.
In abundantly wet years, there is enough vegetation all through the bush, and the tabledrain is not so inviting.
Wildlife does not recognise a road as a 'line of death' or a line of demarcation between boundaries - hence they appear 'dumb' but they never had primary school lessons teaching them about looking left and right - human toddlers are the same before they are 'educated'.
Soooooo (sorry to be long-winded about the explanation) - it is a good idea to have plenty of light, lighting up these tabledrains looking for wildlife. This can also include emus, goats, pigs, goannas, eagles, wombats, rabbits, foxes, lizards, crows, cattle, horses, sheep and camels - depending on whereabouts in Australia you are riding.
Finally - there even the concern of the big road trains and B-Double trucks/lorries that travel through the night and play 'roo bowling'. One has to be alert to the carcass' that may litter the roads early morning as they are quite a lump and quite a surprise when in the middle of the road through a curve or over a rise.
For a while, I had thought of a HID upgrade to my headlight array to keep the road filled in when you have to dip your lights for oncoming traffic. I am always conscious that there could be a marsupial carcass or severe pot hole in the road in that 'no man's' land, and it used to cause me concern. The HID installation as follows allayed a lot of this concern.....
Saturday, November 24, 2012
Part 2 - Diesel's Spring Clean and Rewiring Project - ST1300 Pan European
Time to start the soldering, crimping, mounting and cable-running phase.
I had planned the fuse block to go in to the duck tail, in front of the cruise control unit, and mounted on a plate.
Here is what I was starting with...
I bought some stainless steel plate and started to shape it to be able to fit the area snugly, and to neaten up the appearance...
Once in place, I marked up some holes and mounted the base of the fuse block and a relay to it..
It ended up looking pretty good.
Now, I had put in a lot of thought to the actual joints for the connectors so that they were firm and reliable. This meant purchasing a good quality crimper and connector set...
I got this crimper, which comes with 5 different sets of dies (jaws) for different applications...
I also made a decision to 'work clean' as this helps the job to run a little smoother...
It didn't always look like this, but it made selecting tools and components a fair bit easier.
Oh, and make sure you pour yourself a good Cab-shiraz too.
I chose an old classic to listen to...
And completed the feng shui ensemb with an incence burner...
Right. Ready to go then....
After a practice or two, I started making connections like this....
...And therefore - the wiring started to look like this.....
I was pleased with how things were shaping up.
I also wrapped wires with protectors and cable ties to keep the wires safe, and organised. It also looked neater...
I then meticulously ran the cables through the bike frame as they had to carry current from the rear ducktail to the front of the motorcycle.
This was the reason for stripping the Pan down, so I could get to a lot of the fiddly and hidden areas, such as under the air box.....
I really recommend you pour another cab-shiraz here and take your time considering the route you want your wires to take, and fiddle about for an hour if necessary to get this part right. You will be grateful looooong after the pain and frustration of this process if you do it right. This ensures a nice job visually, but more importantly, you get the wiring loom into positions where they won't be pinched or rub (and therefore eventually fail) on other components during the riding process.
Also - keep in mind the heat centres of the bike here when it is at running temps, that you are not too close to exhausts etc.
I took the trouble/opportunity to run a second multistrand cable in case I needed some lower amperage power feeds later on...
And I made sure I left enough length, and tied it off at the front of the bike...
I can't emphasise enough here about sitting, thinking and planning your job weeks before you actually attempt it, as you learn things you didn't know, and the plan changes sometimes many times before the final is laid down. You also think of planning ahead - like this (currently) redundant cable. I'll be glad it's there for future plans when the time comes.
See the next instalment for fitting the HID spotlights and rewiring the lighting setup.
End of Part 2.
I had planned the fuse block to go in to the duck tail, in front of the cruise control unit, and mounted on a plate.
Here is what I was starting with...
I bought some stainless steel plate and started to shape it to be able to fit the area snugly, and to neaten up the appearance...
At first - I tried a sheet of aluminium, but found that it was not sturdy enough for the job, and then got the more substantial piece of steel, which meant using different tools to mount it...
It ended up looking pretty good.
Now, I had put in a lot of thought to the actual joints for the connectors so that they were firm and reliable. This meant purchasing a good quality crimper and connector set...
I got this crimper, which comes with 5 different sets of dies (jaws) for different applications...
I also made a decision to 'work clean' as this helps the job to run a little smoother...
It didn't always look like this, but it made selecting tools and components a fair bit easier.
Oh, and make sure you pour yourself a good Cab-shiraz too.
I chose an old classic to listen to...
And completed the feng shui ensemb with an incence burner...
Right. Ready to go then....
After a practice or two, I started making connections like this....
...And therefore - the wiring started to look like this.....
I was pleased with how things were shaping up.
I also wrapped wires with protectors and cable ties to keep the wires safe, and organised. It also looked neater...
I then meticulously ran the cables through the bike frame as they had to carry current from the rear ducktail to the front of the motorcycle.
This was the reason for stripping the Pan down, so I could get to a lot of the fiddly and hidden areas, such as under the air box.....
I really recommend you pour another cab-shiraz here and take your time considering the route you want your wires to take, and fiddle about for an hour if necessary to get this part right. You will be grateful looooong after the pain and frustration of this process if you do it right. This ensures a nice job visually, but more importantly, you get the wiring loom into positions where they won't be pinched or rub (and therefore eventually fail) on other components during the riding process.
Also - keep in mind the heat centres of the bike here when it is at running temps, that you are not too close to exhausts etc.
I took the trouble/opportunity to run a second multistrand cable in case I needed some lower amperage power feeds later on...
And I made sure I left enough length, and tied it off at the front of the bike...
I can't emphasise enough here about sitting, thinking and planning your job weeks before you actually attempt it, as you learn things you didn't know, and the plan changes sometimes many times before the final is laid down. You also think of planning ahead - like this (currently) redundant cable. I'll be glad it's there for future plans when the time comes.
See the next instalment for fitting the HID spotlights and rewiring the lighting setup.
End of Part 2.
Subscribe to:
Comments (Atom)


